


Smart Search
Smart Search https://help.heredis.com/wp-content/themes/corpus/images/empty/thumbnail.jpg 150 150 Heredis Help Knowledgebase https://help.heredis.com/wp-content/themes/corpus/images/empty/thumbnail.jpgSmart Search
This function allows you to find specific data in your genealogy by combining different search criteria; you may then modify or process the data you have found.
It is impossible to quote all possible combinations so try, read the blue sentence carefully to see if the configured query matches what you are looking for.
To access Smart Search:
- choose Smart Search in the Find drop-down menu
- or select the Search > Smart Search tab

- or click on the Find
 icon and select
  Smart Search in the drop-down menu
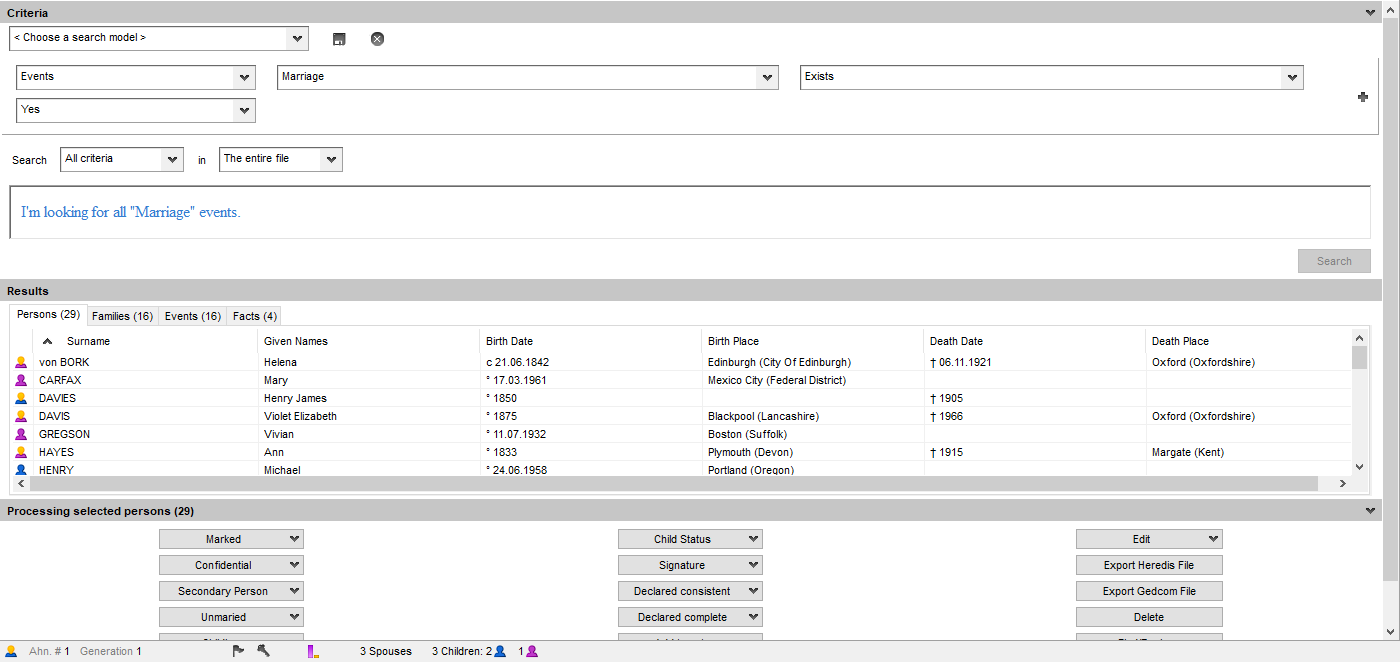
The Smart Search tool is composed of a “Criteria” field, a “Results” section, and a “Processing selected results” section. (Mac) This screen is also linked to a specific side panel entitled “Results”.
Search Criteria
The Heredis default display shows <Persons> as the first search criterion, then the <Surname> field, and the <Begins With> operator. In the entry field to the right of <Begins With>, type in the first letters of the surname you are looking for and click on the Search button to find all relevant persons in your genealogy.
The initial search criterion will determine what the next field options are.
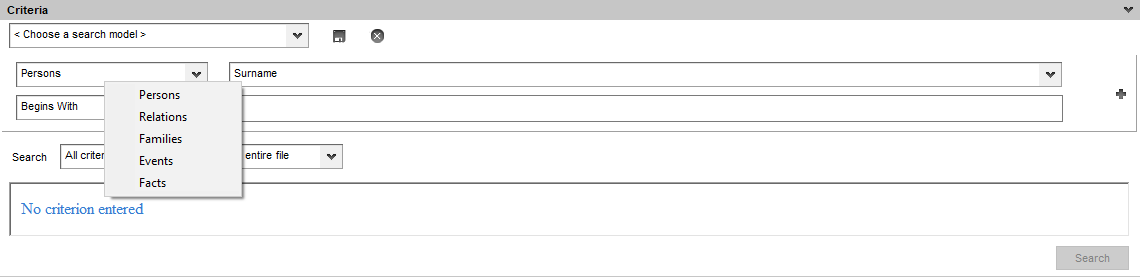
(Windows) Selecting criteria
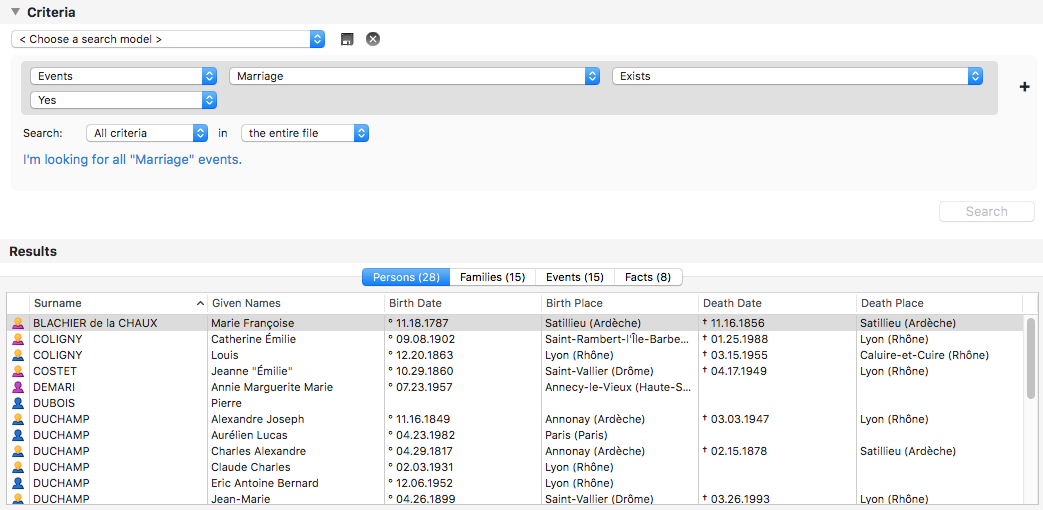
(Mac) Selecting criteria
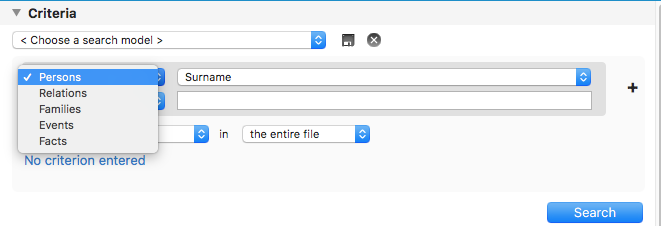
Click on each of the fields and specify the type of information you are looking for in your genealogy. You can combine criteria such as Persons, Relations, Families, Events, Facts to build more or less intricate searches depending on the number of criteria you have selected.
- The
 button to the right of the <Choose a search model> pop-up menu allows you to remove all existing criteria and to clear the list of results.
 - The
 and
and  buttons to the right of a criteria line allow you to add or remove a criterion. Note that the
  button won’t be displayed unless you have already added at least one criterion.
Additionally, you can organize the combination of your criteria by clicking on the pop-up menu located below the criteria selection area.
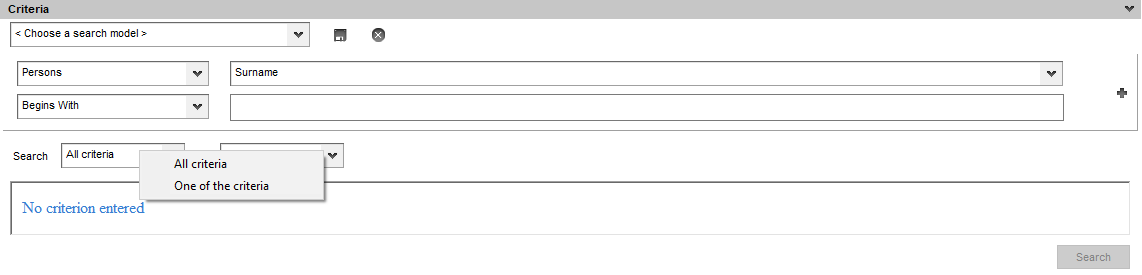
(Windows) How to combine search criteria
(Mac) How to combine search criteria
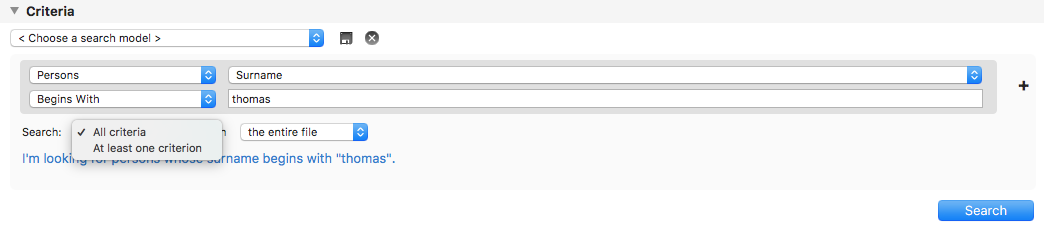
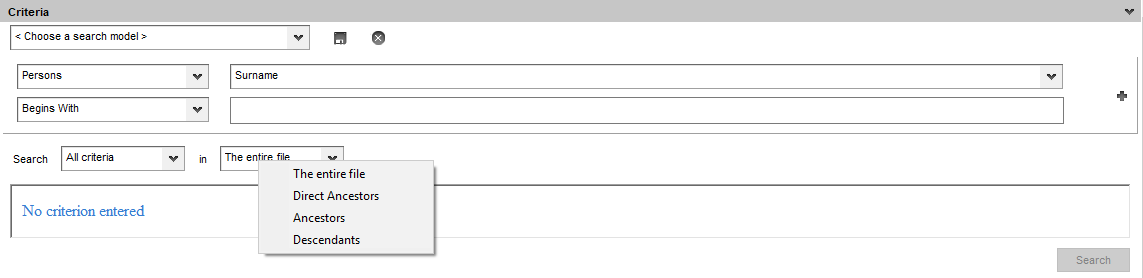
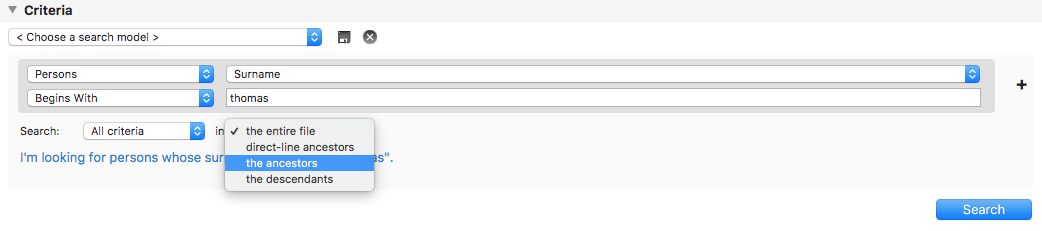
The default search mode is set on <All criteria>. This option allows Heredis to search all data that match at least one of the criteria you have selected. You can also narrow your searches down to specific parts of your genealogy or use the entire file.
Click on the pop-up menu that reads <the entire file> and select <direct-line ancestors>, <the ancestors>, or <the descendants>.
(Windows) How to limit the search
(Mac) How to limit the search
Existing models
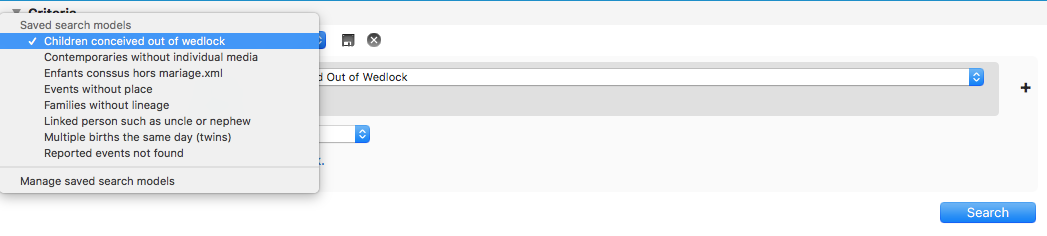
Heredis provides pre-saved search models to help you create your searches step by step.
Click on <Choose a search model> and select the model you are looking for.
The fields associated with the model you choose are automatically prefilled. You can modify a search model by changing or adding criteria and save these modifications by clicking on the ![]() Save As button located to the right of the field entitled <Choose a search model>.
Save As button located to the right of the field entitled <Choose a search model>.
To manage your models or to reload the saved search models, click on <Choose a search model> and select Manage saved search models.
(Windows) List of saved search models

Mac List of saved search models
Additional options for research
A phrased version of your search is automatically displayed below the criteria fields area. This allows you to verify that the search you have created matches your needs. A message alerts you in case the search you are creating is incorrect.
Other options are available from the cogwheel ![]() in the upper right corner. If you tick Search in variants, the searches will be extended to the variants you entered in your genealogy. If you activate the Comprehensive mode, two additional buttons will be displayed to the left of the Search button: Search in results and Add to results.
in the upper right corner. If you tick Search in variants, the searches will be extended to the variants you entered in your genealogy. If you activate the Comprehensive mode, two additional buttons will be displayed to the left of the Search button: Search in results and Add to results.
Extra buttons in Comprehensive mode in Smart Search
![]()
Search in results allows you to research data within the results of your previous search in order to refine your results.
Add to results allows you to add your search results to the results of your previous search. Thanks to this option, you can build a list of results, adding up data from a series of searches.
If you enable Comprehensive mode, two additional columns appear on the left in the search results: you can select the row and sort by gender.
Note: When you consider your research is complete, hide the Criteria area (Mac) by clicking on the Criteria banner (Windows) by clicking on the arrow on the right side. This will leave more space available to display the results from searches and processing. More space can also be freed by deactivating the phrasing of your search: click on the ![]() cogwheel in the upper right corner and untick Show the edit.
cogwheel in the upper right corner and untick Show the edit.
It is possible to search one or multiple words in all notes : media, sources (or in transcription), events in addition to the notes of persons or unions previously present.
Example of search for note in media

You can also easily search for
- persons of the Ahnentafel line (Persons > Ahn. Number > Is Ahn. number > Yes or No) or those who are not
- persons who are in duplicate branch also called implex (Persons > Ahn. Number > Duplicate Branch > Yes or No)
- persons of the Ahnentafel line between generation X and generation Y (Persons > Ahn. Number > Between Generations > X and Y)

Search for all persons you indicated to have father and/or mother untraceable…
Search results
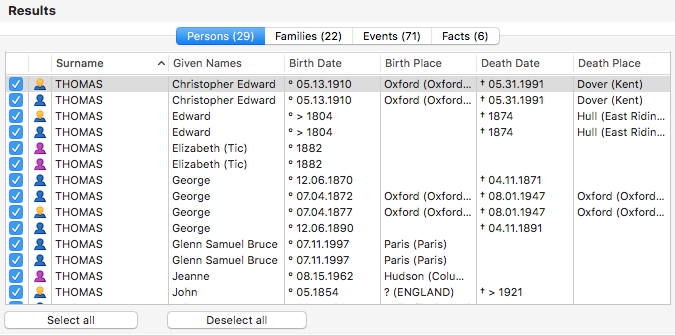
When you click the Search, Search in results or Add to results buttons, Heredis displays the data found under the Persons, Families, Events and Facts tabs.
Within each tab, a number (in brackets) indicates how many persons, families, events and facts were found.
(Windows) Display of Smart Search results
(Mac) Display of Smart Search results
Open the Summary panel. To verify the results displayed in the list are correct, click on any line in the list of results and the details will appear in the Summary panel. The data displayed in this panel varies according to the tab you selected under Results.
Should you notice a mistake to be corrected, double-click on the line in the list of results to directly access the person’s Personal Data in your genealogy file.
Mac Specificity: Results panel
The results of your smart search are also available in the Results panel.
Results Panel – List of found persons
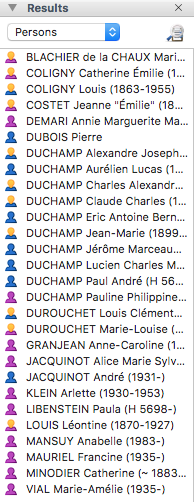
You can navigate in Heredis while keeping your search results on hand. Use the <Persons> pop-up menu to select and display results from the Families, Events or Facts tab. At any point, you can go back to the Smart Search screen by clicking the button ![]() to the right of the pop-up menu.
to the right of the pop-up menu.
From this panel, select a person and use the drag and drop feature to easily complete your genealogy.
Processing results
Now that you have found persons, families, events or facts in your file, you may want to update this data, share it with a cousin, or even publish it in a document.
The Processing feature allows you to do this and much more, based on the data you have selected in the Results section under the current tab.
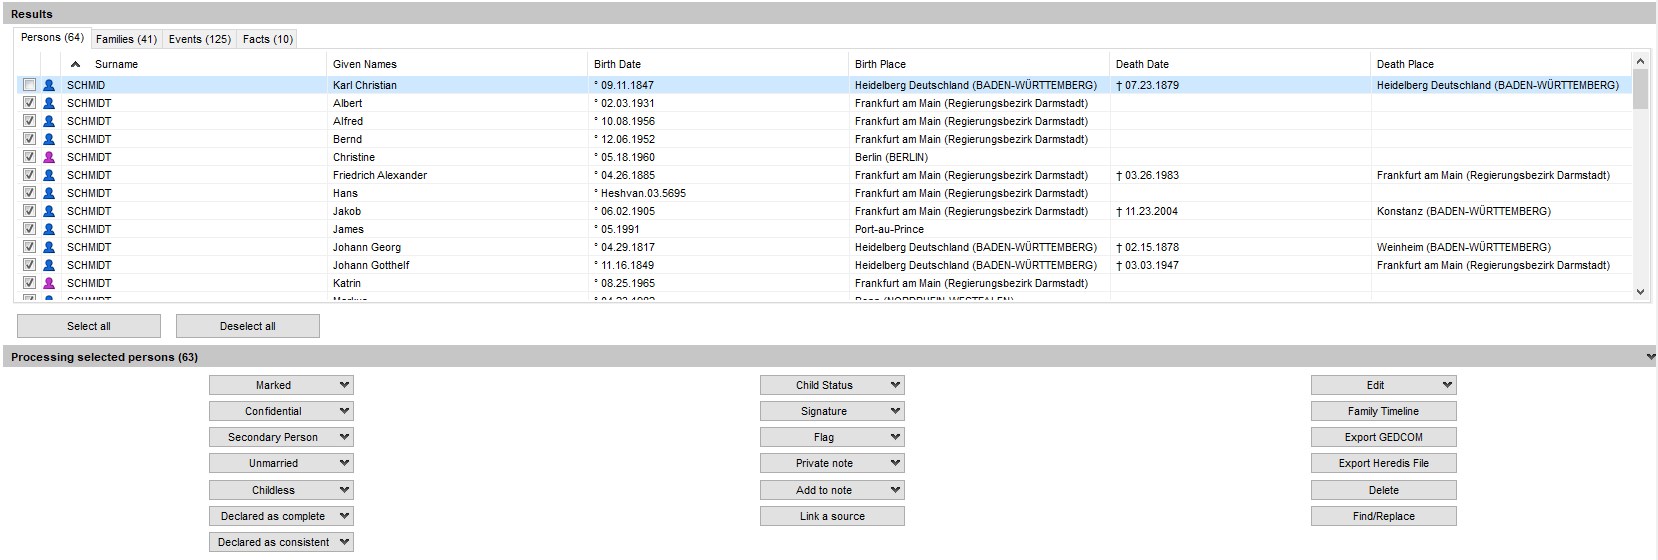
Note: in Comprehensive mode, by clicking the ![]() cogwheel in the upper right corner, checkboxes appear at the beginning of each data line so you can select the data you wish to process. All lines are selected by default; you can untick, one at a time, the lines of results you do not want to include in your processing. Or you can decide to Deselect all and then tick the data lines you want to include in your processing. If you want to go back to including all results, click Select All.
cogwheel in the upper right corner, checkboxes appear at the beginning of each data line so you can select the data you wish to process. All lines are selected by default; you can untick, one at a time, the lines of results you do not want to include in your processing. Or you can decide to Deselect all and then tick the data lines you want to include in your processing. If you want to go back to including all results, click Select All.
Unfold the Processing section, by clicking on the Processing selected <persons>, <families>, <events>, or <facts> banner: action buttons related to the Results tab you selected will be displayed.
(Windows) Processing results
 (Mac) Processing results
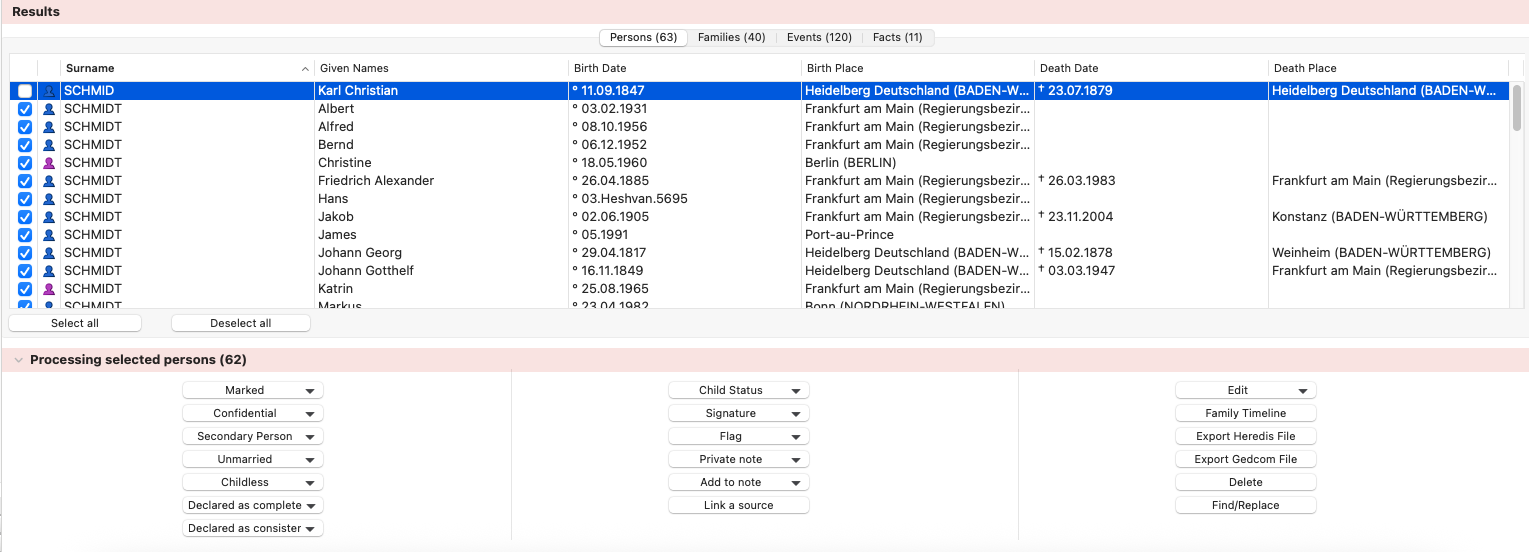
Processing selected persons
If the Persons tab is highlighted in the Results section, you may then decide to:
- Modify a series of additional information for the persons you selected
=> declare them as marked or unmarked, confidential, secondary, unmarried, childless, consistent, complete
=> change the field value under Child Status and Signature
=> starting with Heredis 2025, add/unlink personalized flags, see the article Personalized flags
=> starting with Heredis 2025, make person or search notes private or not
=> add an identical text to all selected persons using Add to note
=> link a common source to all selected persons - Create a Custom report, chronological or alphabetical report listing the persons you selected (Edit by Date or by Name). See also Custom Reports, (Mac) Create and Edit a Report, (Windows) Pre-established reports.
- Create a Family Timeline including search results only. Read the article Family Timeline – Smart Search.
- Export the selected persons as a Heredis or Gedcom file
- Delete the selected persons
- Launch Find/Replace screen. See also Find/Replace article.
Processing selected families
If the Families tab is highlighted in the results section, you may then decide to:
- Modify a series of information for the families you selected
=> change the field value Family Status in the scroll-down list.
=> starting with Heredis 2025, make person or search notes private or not
=> add an identical text to all selected families using Add to note - Create a report listing the families you selected (Edit report)
- Launch Find/Replace screen. See also Find/Replace article.
Processing selected events
If the Events tab is highlighted in the results section, you may then decide to:
- Modify a series of information for the events you selected
=> change event type
=> change the field value under Search Status
=> declare them as private or not private
=> share or no longer share them - Starting with Heredis 2025, add/unlink personalized flags, see the article Personalized flags.
- Starting with Heredis 2025, make person or search notes private or not
- Add an identical text to all selected events using Add to note
- Link a common source to all selected events
- Starting with Heredis 2025, add a new place to the events
- Create a report listing the events you selected (Edit report). See also Custom Reports, (Mac) Create and Edit a Report, (Windows) Pre-established reports.
- You can delete all events of the smart search at once by clicking on Delete button. Warning, this action is irreversible.
- Launch Find/Replace screen. See also Find/Replace article.
Processing selected facts
If the Facts tab is highlighted in the Results section, you may then decide to:
- Modify a series of information for the facts you selected
=> change facts type
=> change the field value under Search Status
=> declare them as private or not private - Starting with Heredis 2025, add/unlink personalized flags, see the article Personalized flags.
- Starting with Heredis 2025, make person or search notes private or not
- Add an identical text to all selected facts using Add to note
- Link a common source to all selected facts
- Starting with Heredis 2025, add a new place to the facts
- Create a report listing the facts you selected (Edit report)
- Delete the facts
- Launch Find/Replace screen. See also Find/Replace article.
Note: the Processing section banner indicates the type of data you are about to process (Persons, Families, Events, Facts) and the number of records you have selected.
