


(Mac) Create and Edit a Report
(Mac) Create and Edit a Report https://help.heredis.com/wp-content/themes/corpus/images/empty/thumbnail.jpg 150 150 Heredis Help Knowledgebase https://help.heredis.com/wp-content/themes/corpus/images/empty/thumbnail.jpgHeredis can edit standard reports provided with the software and create your own report templates. Each report displayed can be changed simply. You can also save or print it directly.
Create a report
1. Scroll down the Documents menu and select one of the standard reports supplied by Heredis. Some reports are constructed from the primary person displayed on the navigation screen (ancestors, descendants), others treat all people saved in the file regardless of their family links or their role (alphabetical, anniversaries, events, families…).
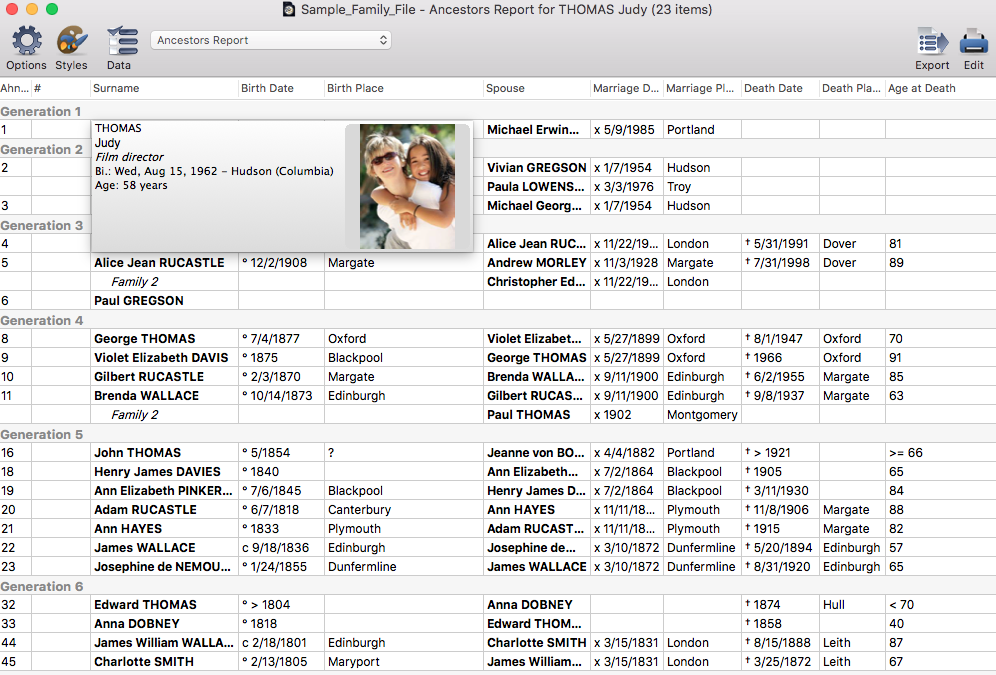
2. Once you have selected, click the report for it to be constructed.
Info • Hold the mouse over the name of a person to see an informative box on this individual. Double-click a line from the report to access all information on the person presented on the Immediate Family tab or any other data entry tab.
Compose a report
When you display a report, the menus and buttons are different, the toolbar indicating the changes you can make (Options – Styles – Data). You will also find two buttons for processing the modified report (Export and Edit).

Move each column by drag and drop. Sort the columns with a click in the column header; an arrow appears in the header of the column. If the column is not sortable, Heredis alerts you.
Resize columns
1. Move the mouse cursor to the edge line between two columns until it changes to a double arrow![]() .
.
2. Hold the mouse button down and drag it to change the column width in the desired direction.
Rearrange the columns
1. Click the header of the column to be moved.
2. Hold the mouse button down and drag it to the new location.
Modify the order of data in the columns
Click the column header. If the column is sortable, an arrow will indicate the sort direction.
When data are grouped in the columns, sorting is applied within each group.
Info • Access to adding or deleting columns is done with the ![]() button. You can create as many columns as you like within the space available for printing.
button. You can create as many columns as you like within the space available for printing.
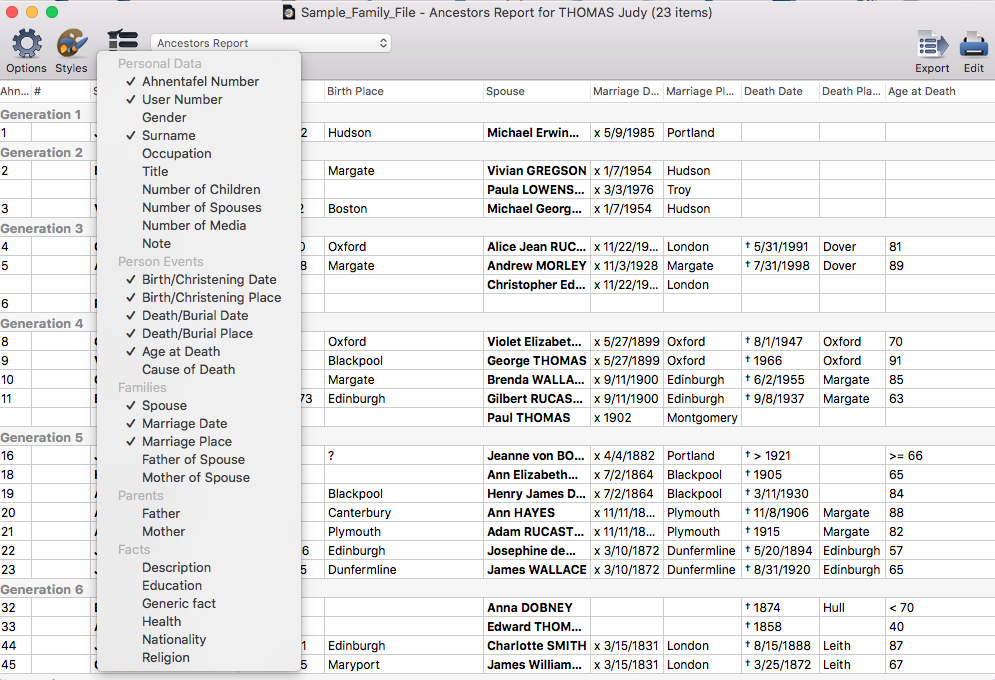
Select the Report options
The options are different for each type of report. They modify the data displayed in the report.
1. Click the Options ![]() button or choose Template > Options.
button or choose Template > Options.
2. Indicate the types of data to be displayed.
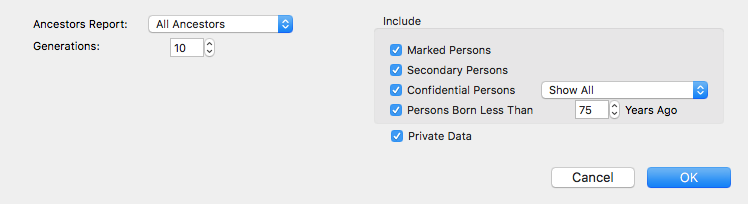
- Ancestors or Descendants Report: choose between a full or partial report (Males Only – Females Only – Name Holders Only) from the pop-up menu. Specify the number of generations to be treated and the type of numbering. Indicate the types of persons for inclusion in the report.
- Persons Reports: Select the method of grouping the data into the report with the pop-up menu (By Name or By Date). Choose from a complete or partial report (Males Only – Females Only) in the pop-up menu. Indicate the types of persons for inclusion in the report.
- Families Report: Select the method of grouping the data in the report with the pop-up menu (grouping by Family status, Places or Dates). Limitations are applied to the data displayed by ticking Limit by Period of Observation or Limit Places and select the values you want.
- Events Reports: Select the method of grouping the data in the report with the pop-up menu (group By Event Types, By Persons, By Places or By Dates). Limitations apply to the data displayed by ticking Period of Observation or Limit Places and select the values you want. Indicate the types of persons for inclusion in the report and the types of events to be processed. Limit the report of events to holders of a particular name.
- Tiny Tafel Reports: Select the method of grouping the data in the report with the pop-up menu. Limitations apply to the data displayed by clicking the Limit by Period of Observation or Limit Places boxes and select the values you want.
Click OK to confirm your choice of options and return to the report.
Options of Ancestors report
Select the format of the reports
Customize the presentation of each report with your color preferences and data format.
1. Click the ![]() button or choose Template > Styles.
button or choose Template > Styles.
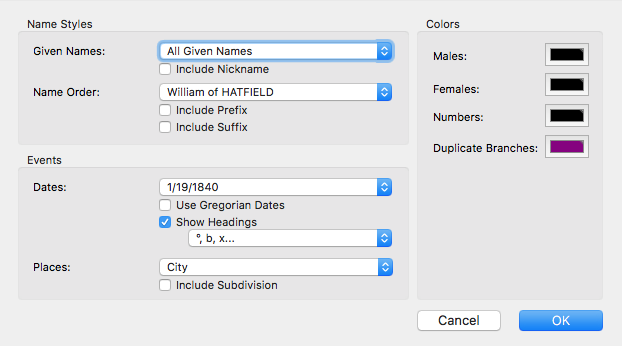
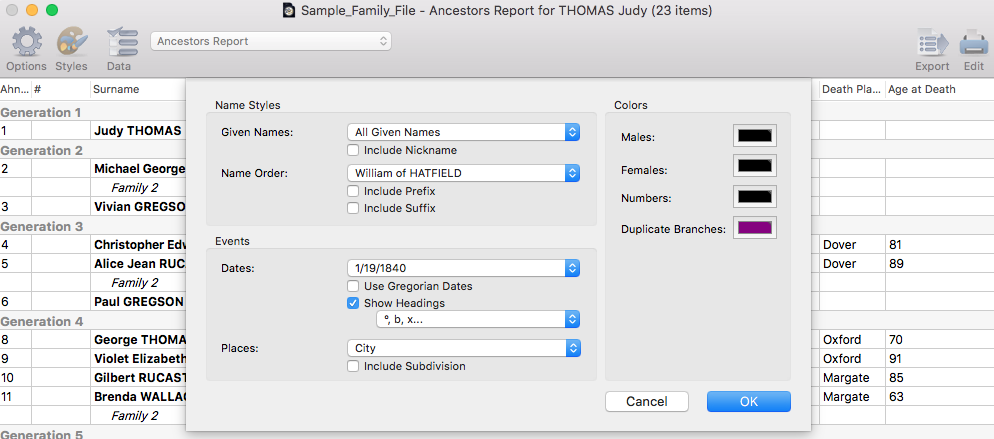
2. Use the menus to define the format of data displayed.
- Given names: choose to display All Given Names, Only First Given Name, Only Usual Given Name (in the absence of a usual given name, Heredis takes the first given name), First Given Name and Initials of Others. Tick the Include Nickname box to add it after the given names.
- Name order: choose the order for surname and given names. Tick the Include Prefix and Include Suffix boxes to add before or after the name if they exist.
- Dates: Select the date format. Tick Use Gregorian Dates, to display this format regardless of the calendar in which they were entered. Tick the Show Headings box for each date to be preceded by the symbol corresponding to the event.
- Places: select the Places format. Select any combination of items among those entered for each location. Tick the Include Subdivision box to add it to each location displayed when it had been entered.
3. Click the color boxes and select a color to modify the colors for Males, Females and Numbers.
4. Click OK to confirm your choice of format and return to the report.
Select the items to be included in the report
The number of columns displayed in the report depends on the items selected. Each item is displayed in a separate column.
1. Click the ![]() button or choose Template > Data.
button or choose Template > Data.
2. Click the item to be added from the pop-up menu, and it is now ticked and appears in a new column, to the right of the last column of the document.
3. Move the column containing the new item to the desired position on the report.
To delete a column, reopen the Data pop-up menu and click again on the item to be deleted. The document will no longer contain this column.
Info • Remember to adjust the width of the other columns according to the available space left by the deleted column.
Since Heredis 2019, there are new fully customizable reports, see the Custom Reports article.
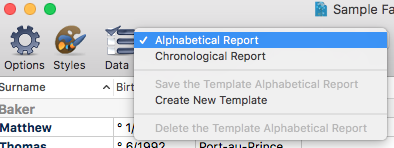
Save a template of the report you customized
For example, choose Documents > Person Reports > By Name (Alphabetical report).
You can modify the list displayed by Heredis before printing.
As previously explained, click Options to improve the presentation of the list, by choosing Classify by Surnames, or change the contents by selecting Men Only.
Add or remove a column by clicking Template. Select Age at death. The column order can be changed by simply dragging with the mouse: place the new column next to Death Place.
If the presentation is how you want it and you want to keep it? Choose Create New Template from the pop-up menu and give it a name: «My list alphabetically.» It will then be available in the list of reports.
Choose in the pop-up menu
Export a report
Click on Export button, choose the software to use and click Export.
The file is now independant of Heredis and can be saved on your hard drive disk, and print from the word processor or spreadsheet application.
Note: Heredis is optimized for Microsoft Office (paid) or LibreOffice (free) word processing available for download. Heredis is compatible with Microsoft Office for Windows as from Office 2013 and for Mac as from Office 2019. As for LibreOffice, it is important that you have the latest version installed and not an older one.
Print Reports
Click Edit and select the word processor on your Mac to which you wish to send it. Changes to the presentation may be made in the word processor that you are familiar with and then you may start printing.
The file is now independant of Heredis and can be saved on your hard drive disk, and print from the word processor.
Note: Heredis is optimized for Microsoft Office (paid) or LibreOffice (free) word processing available for download. Heredis is compatible with Microsoft Office for Windows as from Office 2013 and for Mac as from Office 2019. As for LibreOffice, it is important that you have the latest version installed and not an older one.
