


Indexes: generalities
Indexes: generalities https://help.heredis.com/wp-content/themes/corpus/images/empty/thumbnail.jpg 150 150 Heredis Help Knowledgebase https://help.heredis.com/wp-content/themes/corpus/images/empty/thumbnail.jpgAs you input data, Heredis groups the data by type and creates the corresponding indexes: surnames – given names – occupations – places – sources – media – repositories.
Each Index groups all data entries of the same type, and provides tools to illustrate, edit or delete data throughout the genealogy file.
Accessing Indexes
Indexes are permanently available.
- From the toolbar, click on the
 Indexes button then select the one you want to open.
 - From the Tools menu then choose the index you want to open.
- Click on the corresponding panel of the Search panel. You can access Places, Sources, or Media Index.
Exploring the Indexes
You may use the indexes for finding any data, modify or complete them, and simply navigate throughout your genealogy. Each Index gives you an overview of your data, indicates where they are used and permits you to edit them throughout your genealogy file.
As you enter all data, Heredis will record the details to the right place in the appropriate Indexes: names, occupations, places, sources, media.
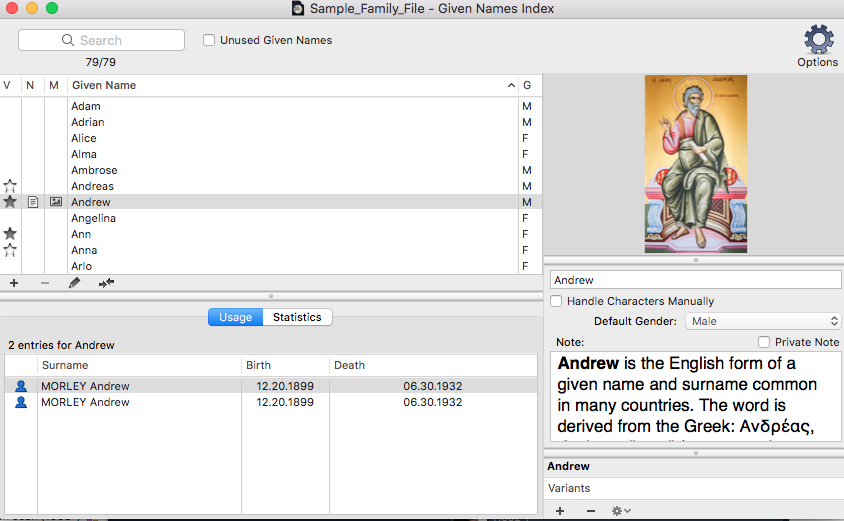
(Mac) Given names Index
(Windows) Given names Index
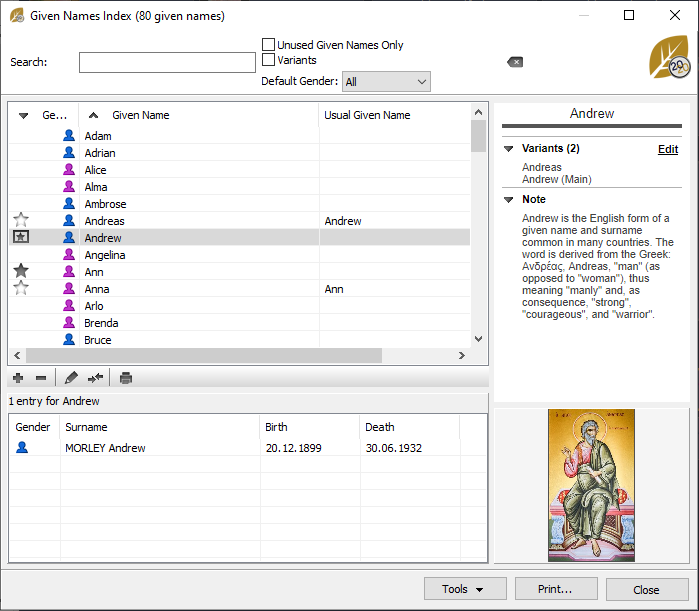
You may consult the list of assignments for every item of data and (Mac) the relevant statistics by period.
Edit by double-clicking or selecting and clicking on the pencil ![]() , comment in notes, illustrate your data in the Index for transmitting throughout your genealogy.
, comment in notes, illustrate your data in the Index for transmitting throughout your genealogy.
Change the spelling of «SHELITO» to «SHILLITO» so that it applies to all holders of this surname. Change the default gender assigned to all new «Lindsey» given names which you may enter. Consult the list of all the «Master builders» and navigate throughout their families. Show photos of the places where your ancestors lived and refine their geolocation. Enter a transcript of an old deed, which you may then consult in each event where the source is assigned. Import folders of photos to the Media Index so that you have them to hand for associating by a simple drag and drop.
Indexes allow you to apply overall treatment for any data of the same type: spelling, specific formatting, associating of variants,notes, illustrations, replacement by another given item of data.
Search and sort
Search for an element in an index
Each Index has a search field at the top left of the screen. Enter the word or phrase to be searched. The search is performed in real time and the displayed list is updated.
(Mac) Click the Search ![]() icon to select the Search mode: «Search Contains» the word, or «Search Starts With» the entered letters.
icon to select the Search mode: «Search Contains» the word, or «Search Starts With» the entered letters.
You also have display filters to refine your search. You can display items that are not used in your genealogy by ticking the Unused… box and then delete them from (Windows) Tools button; (Mac) Option Button.
(Mac) Sorting indexes

(Windows) Sorting indexes

In the Media Index, choose from the pop-up menu to display media type (Image – Video – Missing…) and use (Sources – Persons…).
Only results that match your search criteria are displayed.
The counter (Mac) below the search box, (Windows) in the title of the index window, indicates the number of results compared with the total number of elements in the Index.
Manage the displayed results
You can sort the list of elements in the Index according to the type of information.
Click the column header to rank sites by county, to classify sources by type, classify occupations according to the presence of a note, classify media according to their private character…
The Media Index may be displayed sorted either by file name or by date. Click the buttons on the toolbar of the list.
Display all the elements of an index
To see the complete list of all items in an index, make sure you have no active search criteria or filters.
To cancel a search, click the Delete icon to the right of the search field.
To cancel the filter, uncheck the options. In the Media Index choose All Media and Whole Index in the pop-up menus.
Consulting usage
You can easily visualize the various occurrences of a specific item in your genealogy and conveniently navigate from the indexes.
- Open the index you are interested in.
- Select the line corresponding to the item you want to research.
- (Windows) In the bottom part, the number of occurrences (Usage) will be displayed either directly or under a tab, depending on the index you are using. In the right end column or at the bottom, depending on the index, you will see the variants, attached media and/or notes
- (Mac) Click on the Usage tab in the lower part of the window.

- Double-click on the person’s name to display the person’s data.
- In some indexes, you can view variants, media path, or other information in the right column.
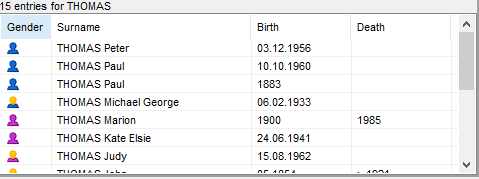
(Mac) Surnames index
(Windows) Surnames index

- All indexes allow you to see where the information is attached. For example: If you want to know who of your family was a doctor, you click on doctor in the occupation index and you will see who had this occupation.
Each item of the index is analyzed so you can improve your knowledge of your genealogy.
(Mac) Click on the Statistics tab to consult usage stats on the item you selected. Heredis will display a graph showing the number of occurrences over a time period.
(Mac) The index window will remain open until you close it. You can go back to it at any time to switch to another usage or to do another search.
Modifying data throughout the file
You have mistakenly added the occupation «Lawyer» instead of «Solicitor»? You want the given name of «LaToya» to be written with a capital T? You realize that you have entered two different sources for the same document?
No need to spend time editing each person in your genealogy. By using the Indexes, you manage globally Surnames, Given Names, Occupations, Places, Sources and Media, and any change is automatically applied wherever the element is used in your file.
- Select the item to be modified. If necessary run a search or sort to find it easily.
- Edit the item:
• (Mac) by entering directly on the right of the Index screen,
• by double-clicking on the line,
• by clicking the Edit and modify… button on the toolbar of the list to open the editing screen.
Modify upper or lower case
Most data managed in the indexes are automatically formatted when entered. The automatic formatting is defined in
- (Windows) Tools menu > Preferences > Appearance;
- (Mac) Heredis menu > Preferences.
You can choose to display the surnames, given names and places in uppercase, or with only the first letter in capitals. However Heredis allows you to change the formatting for a single item and then apply the changes to all uses of this element.
You want to make an exception for a surname, a given name or a place where the spelling is unusual.
- Open the index and find the item in question to be changed.
- Open the editing screen and tick Handle Characters Manually.
- Edit the item. You may type upper and lower case wherever you want for the word. The automatic formatting will not apply to this element that will keep the format that you have chosen.
(Mac) Handle Characters Manually

(Windows) Handle Characters Manually

Replace an element with another
After many data entries, you may have created duplicates: this source is identical to another, such an occupation was spelled in two different ways. Tidy up in the index in question by using the Replace… function.
1. Open the index and find the item in question to be replaced.
2. Click the Replace… ![]() on the toolbar of the list.
on the toolbar of the list.
3. Select the replacement item in the list. Click Choose to confirm the replacement.
The element is replaced in the Index, and therefore wherever it has been used in your genealogy. The Index now contains one element less than before.
Info: An element with variants can’t be replaced. You first have to unlink the variants.
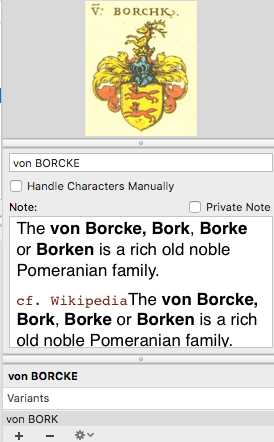
Manage variants
The notion of a variant allows you to assign several elements to an Index entry. You can define variants of Surnames, Given Names, Occupations and Places.
Place names have sometimes changed over the centuries. As part of your genealogical research, you may find a number of variants for the same place. «New Amsterdam» was renamed «New York» in 1665, «Philipstown (Leinster)» became «Daingean» in 1929. Similarly, you may encounter a name spelled differently depending on the date of the certificate found: the «Taylor» family is sometimes noted with the spelling «Taylour» or «Tayler».
Specify the variants
- Open the index in question.
- Select the surname, given name, occupation or place you choose as the standard version.
In the variants field at the bottom right of the screen, click the ![]() (Link a variant…).
(Link a variant…).
- (Mac) click on the
 button in Variants area.
- (Windows) click on the link Edit, then on button in Variants area.

- (Windows & Mac) Select the item to be the variant and press the Choose button.
You can repeat this as necessary to add several variations to the main element.
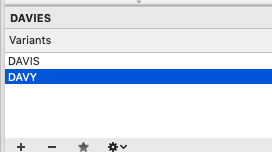
Choose the main variant
You can choose the main variant for a surname, given name, or occupation. Select the variant you wish to see as the main and click on the ![]() button. The main variant appears with a grey star
button. The main variant appears with a grey star ![]() and its variants with a white one
and its variants with a white one ![]() .
.
To change the main variant, select the element to be the main element, then click on the ![]() button.
button.
Unlink variants
To unlink a variant, select Variants in the screen and click the ![]() (Unlink the selected variant) button.
(Unlink the selected variant) button.
To remove all variants of a group: click the cogwheel icon in the Variants field, and choose Remove this group of variants.
To remove all variants from your genealogy file, click the Options button on the toolbar and choose Unlink All Variants…
Info • Deleting a variant does not remove the item from the index. Only the link of the element in the index is deleted.
Delete unused data from an Index
You can delete at one go all the elements that are not used in your genealogy file.
As a precaution, review first the list of unused data by ticking the Unused… box in the search field.
1. Click the (Windows) Tools / (Mac) Options button on the toolbar of the Index and select Remove All Unused…
2. Confirm the deletion by clicking OK.
