


Create a new file from a GEDCOM 5.5.1
Create a new file from a GEDCOM 5.5.1 https://help.heredis.com/wp-content/themes/corpus/images/empty/thumbnail.jpg 150 150 Heredis Help Knowledgebase https://help.heredis.com/wp-content/themes/corpus/images/empty/thumbnail.jpgYou have already created a genealogy file or you have been given one created on another application? Importing a GEDCOM file, the recognized standard in the world of genealogy, is very simple.
Though, importing a GEDCOM or opening it for the first time, takes time. Do not validate too quickly the import options, you won’t be able to change the import afterwards.
On Mac
- From the Heredis Home Page, choose the GEDCOM File in the Open menu and click OK.
- The GEDCOM file must have the extension .ged to be recognized by Heredis. Select the file and click Open.
Note: Heredis recognize also .gdz format, this kind of files are GEDCOM 7 file. See Creating a new genealogy from a GEDCOM 7 file.

- Give it a name.
- Choose where to store it on your hard drive disk. Use the arrow on the right to access to all folders on your computer.
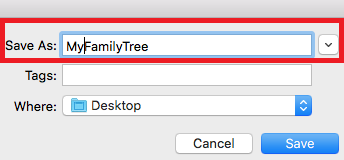
- Validate by clicking on Save and wait while Heredis analyzes the data.
- Check the information found in the GEDCOM file (quantity of data, structure of places). All softwares do not manage all data of places the same way. Click on Select Appropriate Place Elements if you need to reorganize the data and click on the headings of columns to change them.
It will not be possible to modify this order once the file is open! So take your time.

- Click on Next when your done with places.
Each program has its own GEDCOM tags to indicate non-standard data. See the articles What is a GEDCOM file? and GEDCOM tags generated by Heredis for more information on the subject.
If Heredis does not understand a tag, then a window will open and ask you to handle this information yourself.
It will not be possible to modify it once the file is opened! Hence the importance to take the time to go through this process carefully.
You can choose whether or not to import unknown elements (tags). Heredis informs you of the type of data, e.g. whether it is a Source or Media item, etc.
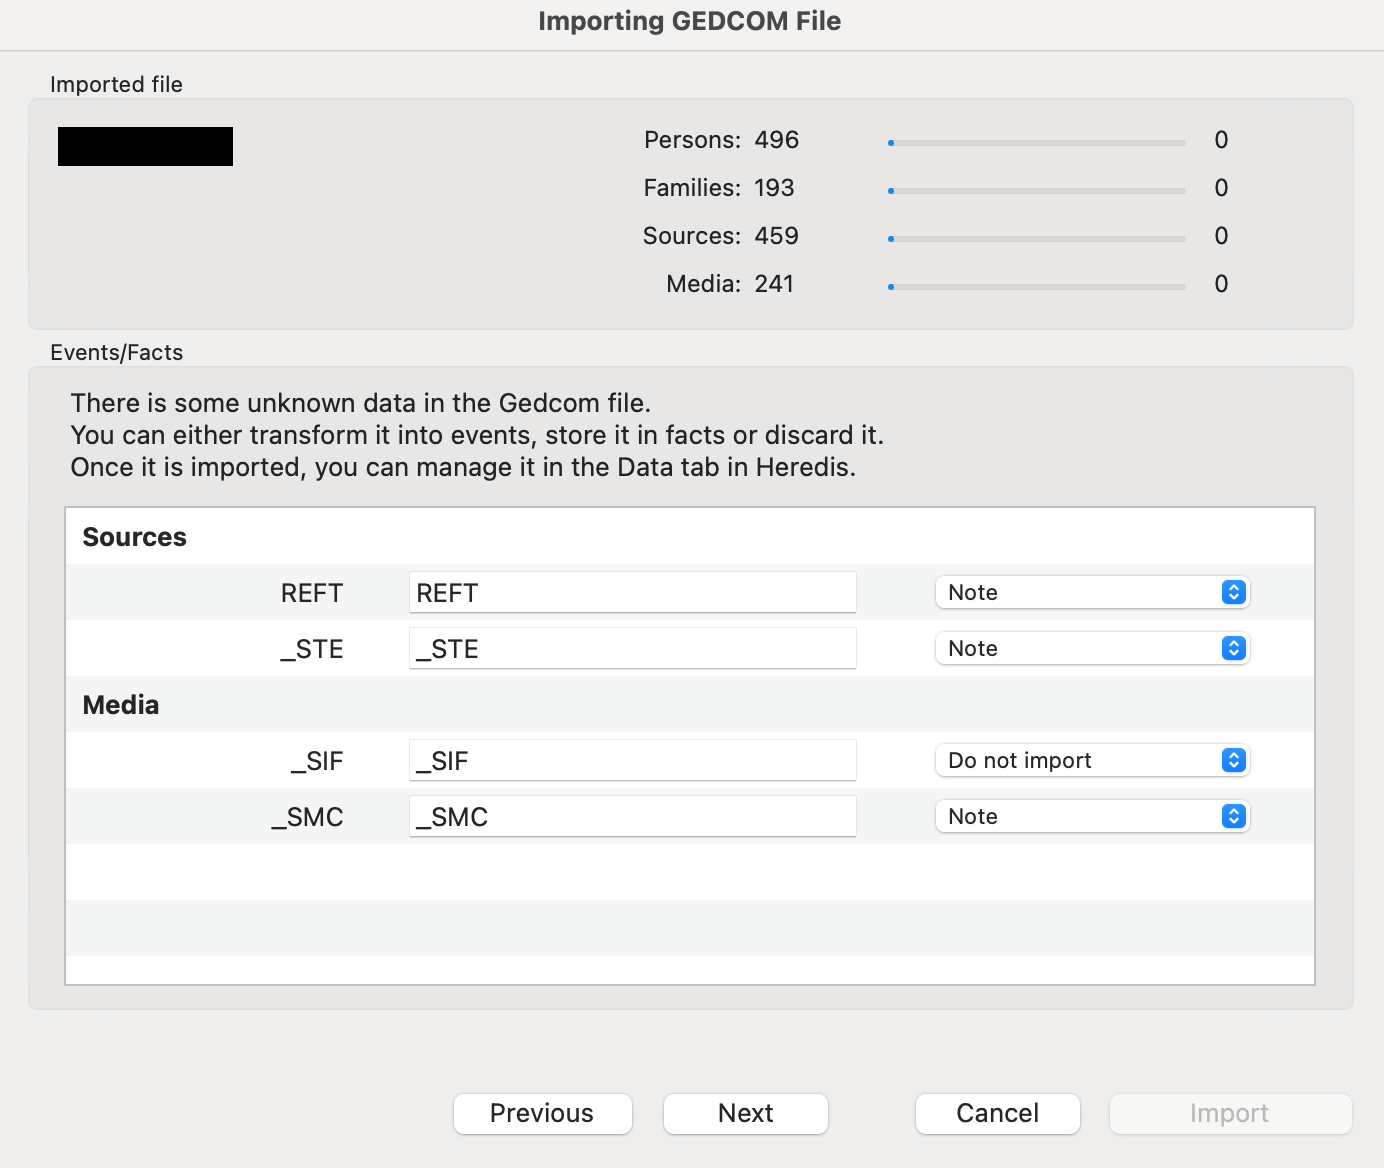
If you know the type of data indicated, click in the white box and modify the tag by indicating the title.
For example, you know that the REFT tag used by the software that created the GEDCOM corresponds to the document type. Click in the white box, delete REFT and indicate Type.
Click on the drop-down list and choose the location where you wish to see this element: Document.
If you don’t know the data type, choose Do not import to avoid polluting your file with unknown elements.
Consult the user’s manual of the software that created the GEDCOM file to figure out what the “unidentified” tags refer to.
- Once the tags are taken care of, click Next.
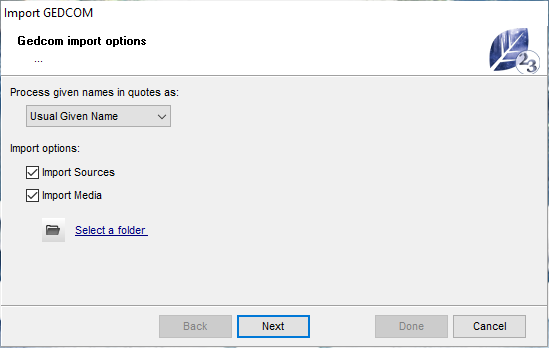
- Choose how to manage given names in quotes.
- Choose to import or not medias and sources.
Be aware that a GEDCOM 5.5.1 file never contains media, only the name and way to the original of the media. So even if you choose to import a media, you’ll import only the name and way to the original.
- If you have the media on your computer, click on Select a folder to indicate to Heredis where they are stored.

- You may add a source common to all data imported. In this case, tick the box Assign a new source to and choose the kind of data to source (events, facts…). Fill in the name, repository and type of document of the source.
- Click on Import to start converting your GEDCOM 5.5.1 into a Heredis format. This step can take some time depending on the size of the file, so be patient. Your GEDCOM file will still be available in the GEDCOM format. Heredis extract the data from the GEDCOM file and converted them into a Heredis format.
Note: Ahnentafel numbering is a mobile data, it can be changed at any time, so it is not a data stored in the GEDCOM format. You might have to change the root person to get the Ahnentafel numbering woshed. See The Root Person article.
On Windows
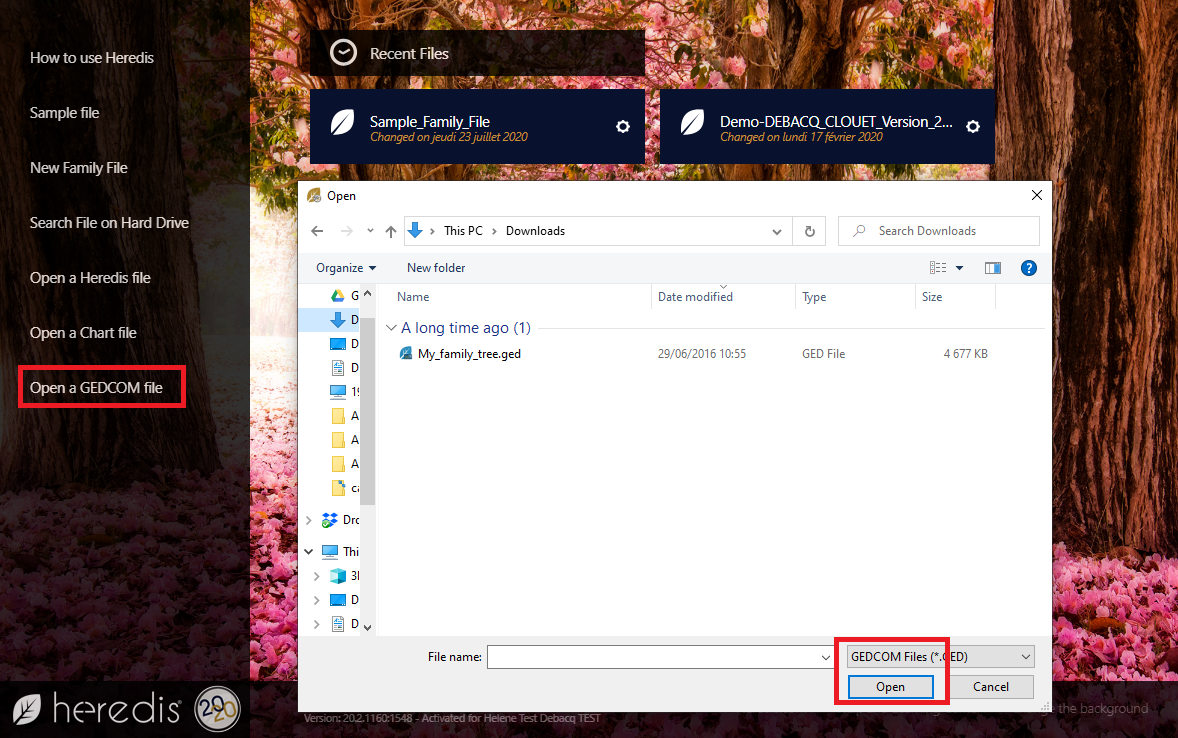
- From the Heredis Home Page, click on Open a GEDCOM file.
- The GEDCOM file must have the extension .ged to be recognized by Heredis. Select the file and click Open.
Note: Heredis recognize also .gdz format, this kind of files are GEDCOM 7 file. See Creating a new genealogy from a GEDCOM 7 file.
- Give it a name.
- Choose where to store it on your hard drive disk. Click on Modify to change where to keep your file. By default Heredis puts it in Document > BSD Concept > Heredis > Heredis files.
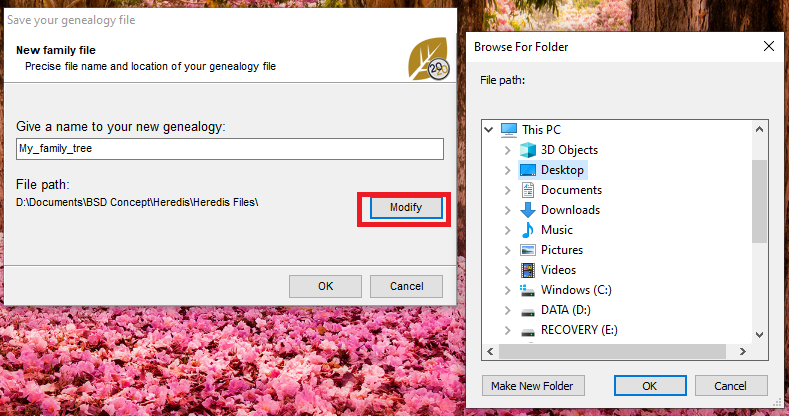
- Validate by clicking on OK and wait while Heredis analyzes the data.
- Choose how to manage given names in quotes.
- Choose to import or not medias and sources.
Be aware that a GEDCOM 5.5.1 file never contains media, only the name and way to the original of the media. So even if you choose to import a media, you’ll import only the name and way to the original.
- If you have the media on your computer, click on Select a folder to indicate to Heredis where they are stored.
- Click on Next.
- Check the information found in the GEDCOM file (quantity of data, structure of places). All softwares do not manage all data of places the same way. Click on Select Appropriate Place Elements if you need to reorganize the data and click on the headings of lines to change them.
It will not be possible to modify this order once the file is open! So take your time.

- Once the places have been listed correctly, click Next.
Each program has its own GEDCOM tags to indicate non-standard data. See the articles What is a GEDCOM file? and GEDCOM tags generated by Heredis for more information on the subject.
If Heredis does not understand a tag, then a window will open and ask you to handle this information yourself.
It will not be possible to modify it once the file is opened! Hence the importance to take the time to go through this process carefully.
It will not be easy to modify this order once the file is open! So take your time.
You can choose whether or not to import unknown elements (tags). Heredis informs you of the type of data, e.g. whether it is a Source or Media item, etc.
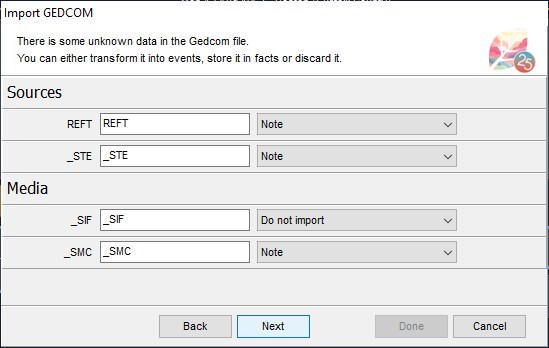
If you know the type of data indicated, click in the white box and modify the tag by indicating the title.
For example, you know that the REFT tag used by the software that created the GEDCOM corresponds to the document type. Click in the white box, delete REFT and indicate Type.
Click on the drop-down list and choose the location where you wish to see this element: Document.
If you don’t know the data type, choose Do not import to avoid polluting your file with unknown elements.
Consult the user’s manual of the software that created the GEDCOM file to figure out what the “unidentified” tags refer to.
- Once the tags are taken care of, click Next.
You may add a source common to all data imported. In this case, tick the box Assign a new source to and choose the kind of data to source (events, facts…). Fill in the name, repository and type of document of the source.

- Click on Done to start converting your GEDCOM into a Heredis format. This step can take some time depending on the size of the file, so be patient. Your GEDCOM file will still be available in the GEDCOM format. Heredis extract the data from the GEDCOM file and converted them into a Heredis format.
Note: Ahnentafel numbering is a mobile data, it can be changed at any time, so it is not a data stored in the GEDCOM format. You might have to change the root person to get the Ahnentafel numbering woshed. See The Root Person article.