


Location Wheels
Location Wheels https://help.heredis.com/wp-content/themes/corpus/images/empty/thumbnail.jpg 150 150 Heredis Help Knowledgebase https://help.heredis.com/wp-content/themes/corpus/images/empty/thumbnail.jpgThe Ancestors and Descendants wheels can be found under the Graphs tab.
You can apply an additional filter to create a “location wheel” and see at a glance the geographical origin of your ancestors and of their descendants.
Note: Since Heredis 2026, the options panel has been optimized. Click on the Contents or Display title to reduce the number of options displayed.
Create a location wheel
Select the primary person for whom you wish to create an Ancestors or Descendants location wheel.
Click on the Graphs tab.
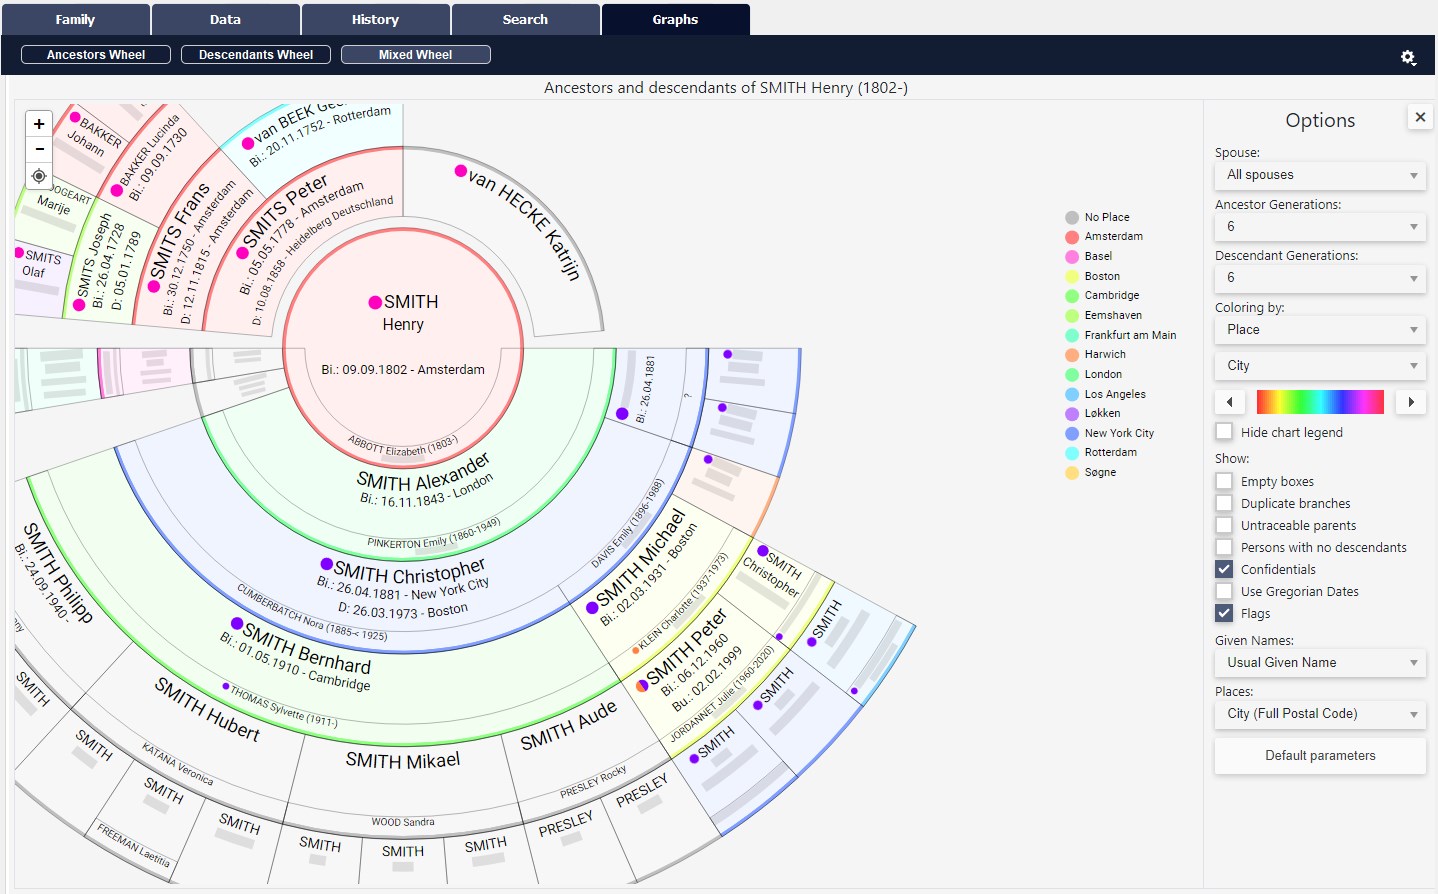
Click on the type of wheel you have in mind: Ancestors Wheel or Descendants or Mixed Wheel .
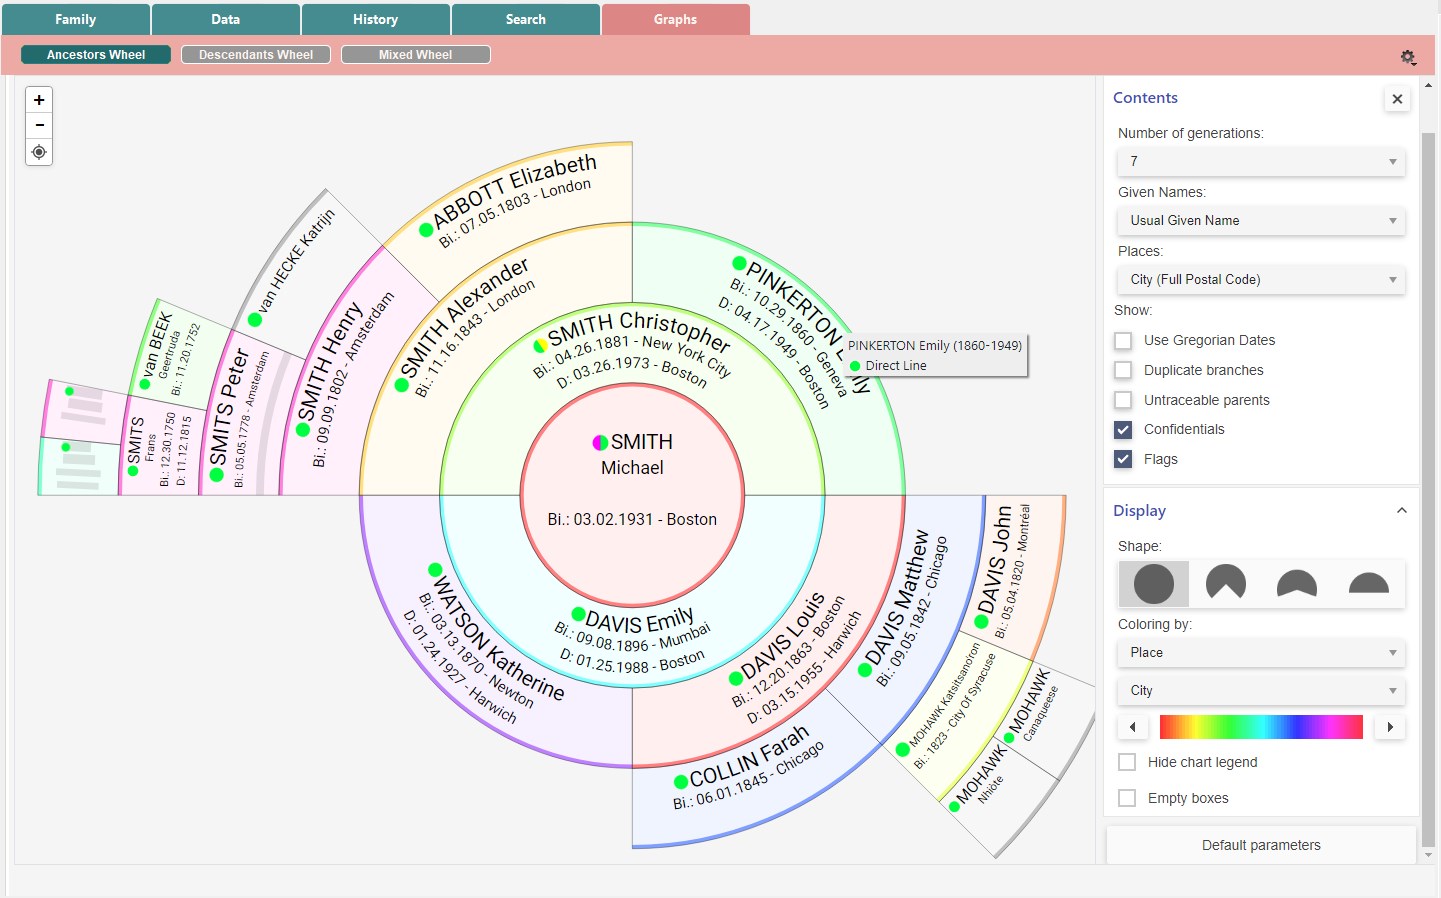
In the Options > Display section, choose the shape. In the Options > Contents section, specify the number of generations to manage.
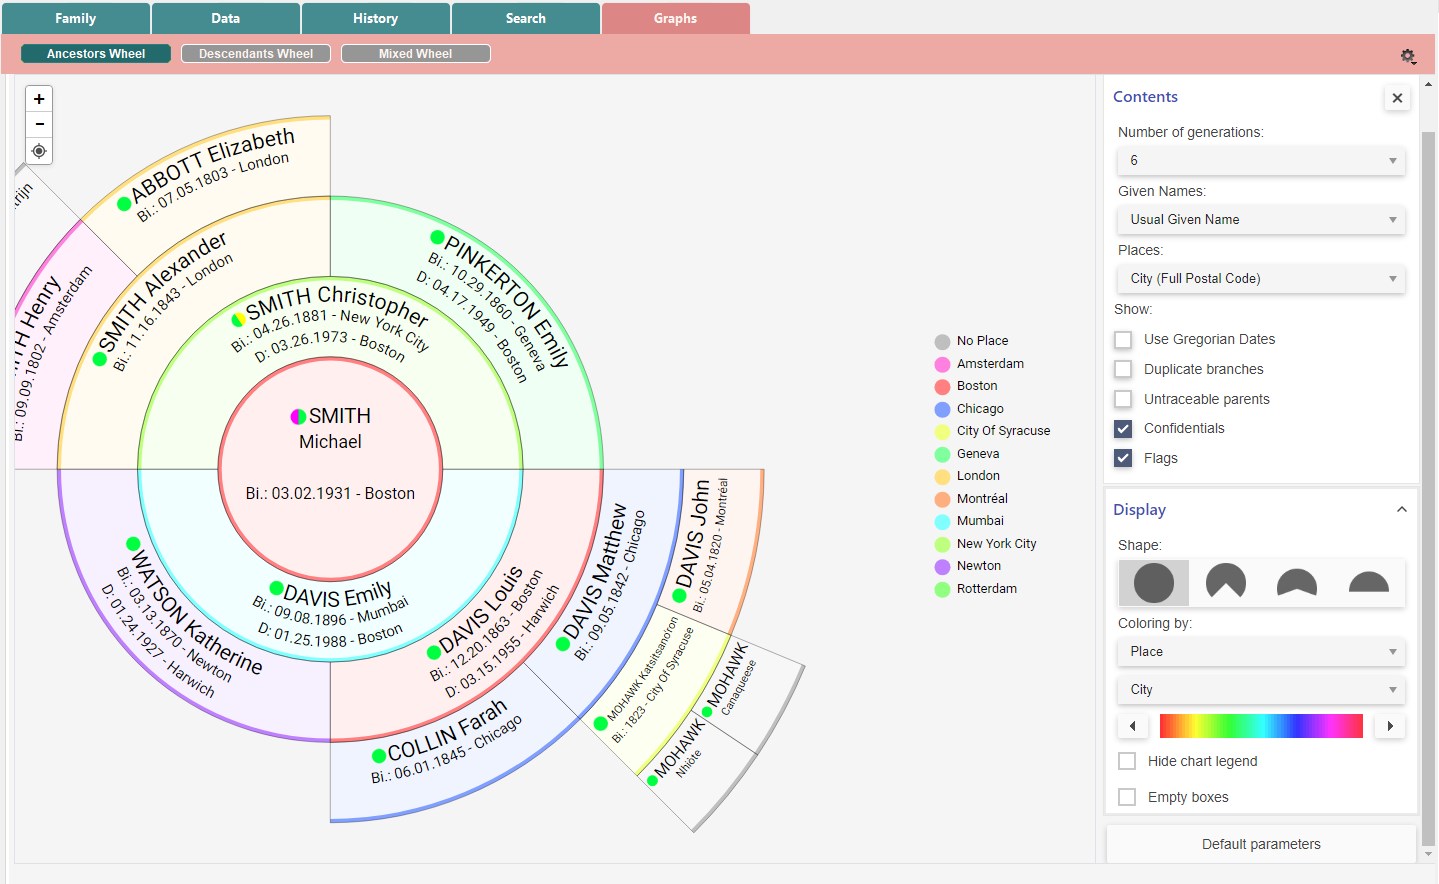
In Display section, click on the dropdown list and choose the coloring by Place, then proceed in the same manner with the next dropdown list to choose the coloring either by
- city
- county
- state/province
- country
You can modify your wheel’s base color by clicking on the arrows or hold your mouse left click on the color strip and drag to the desired color.

Click on Hide the legend to remove the color legend available to the right of the wheel.
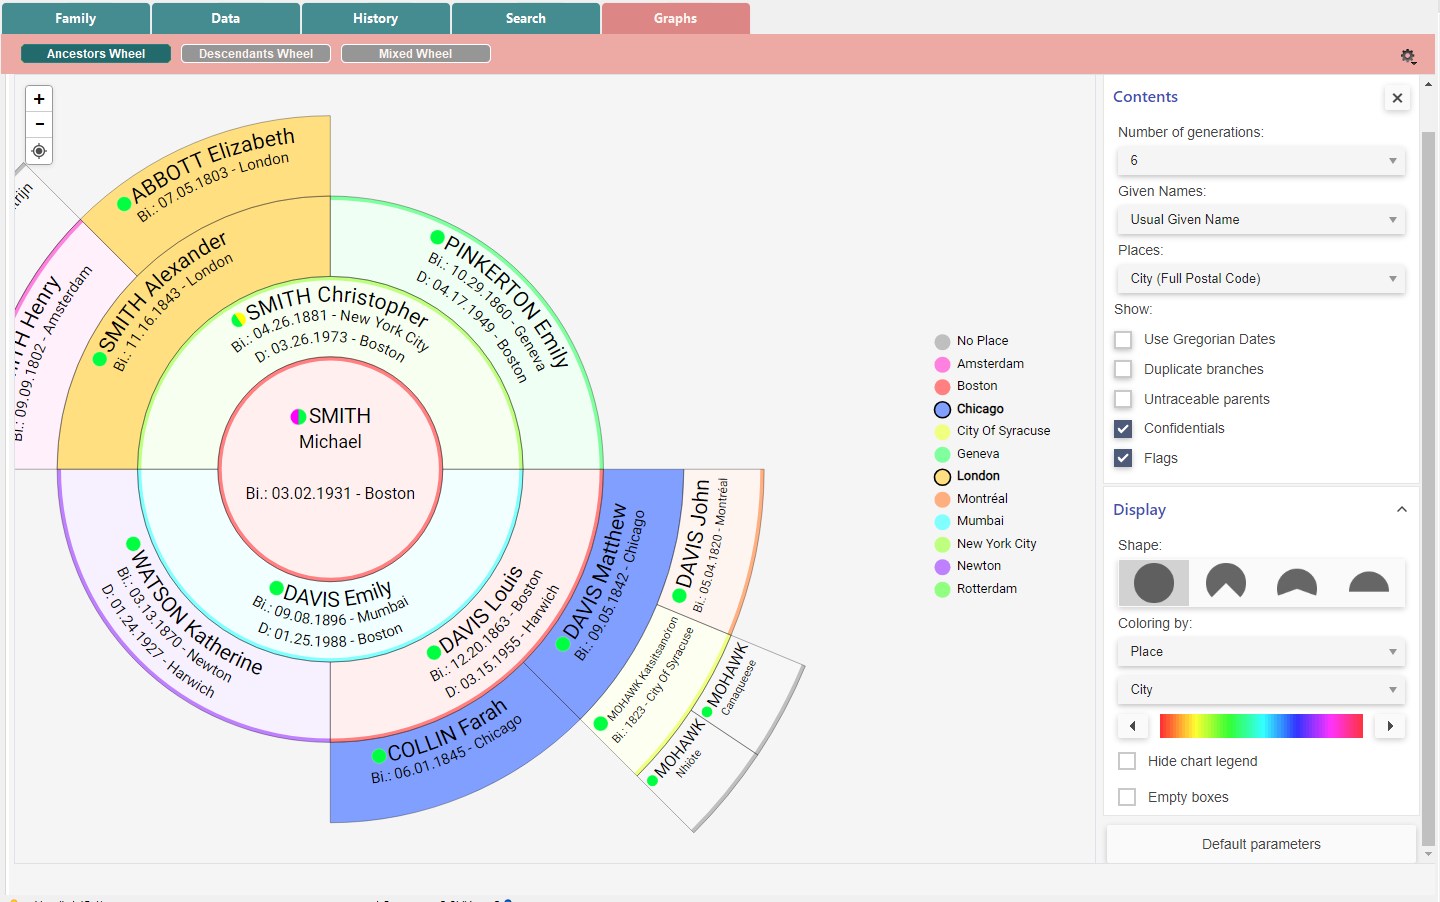
If you click on a location in the legend, all occurrences are highlighted. You can click on multiple locations at once.
If the person has no place of birth, the box will be colored gray. Click on No place in the legend to highlight
In Contents section, as with the previous Ancestors, Descendants and Mixed wheels, you can check/uncheck the following boxes depending on the kind of wheel chosen:
- Empty boxes. To obtain a perfect wheel, or simply to view the remaining work, check the Show empty boxes box to view them.
- Duplicate branches. In genealogy, consanguineous marriages are common. These marriages lead to the repetition of branches, known as implexes. You can view implexes by checking the duplicate branches box. The text in the boxes of persons present several times in the wheel is then written in red. You can then right-click on one of the implexed boxes and choose Show all occurrences to see where the boxes for that person are located. Heredis highlights them for ease of use.
- Persons with no descendants (in Descendants and Mixed Wheels): If you have ticked the “Persons with no descendants” box (see The different data fields > Flags and their use) in personal data tab, you can display the end of the branch by ticking the box. Childless will then be written in a box to indicate the end of the branch.
- Untraceable Parents allows you to display the boxes of missing parents of an individual.
- Confidentials display or not the persons declared confidential in the genealogy. If “Confidential”
 is unchecked, persons will appear with the word Confidential in their box.
 - Use Gregorian Dates. This option makes it possible to transform the dates entered into an unusual calendar into a Gregorian date for a better understanding, for your family members, for example.
- Flags. If you have set tags for the persons in your genealogy and you tick the box, the persons present will be marked with the flag(s) icon(s).
Choose the format of your first names by clicking on the drop-down menu.
- all given names,
- first given name,
- usual given name
- or the given name and initials of subsequent names.
Choose the format of the places shown in the boxes.
Click the Default parameters button to go back to return to the default settings of the wheel.
Export and Print the Wheel
See the article Export a personal or family timeline or wheel for printing, which explains the details.