


Customize Heredis
Customize Heredis https://help.heredis.com/wp-content/themes/corpus/images/empty/thumbnail.jpg 150 150 Heredis Help Knowledgebase https://help.heredis.com/wp-content/themes/corpus/images/empty/thumbnail.jpgYou may adapt Heredis to your personal work methods.
Select the Toolbar
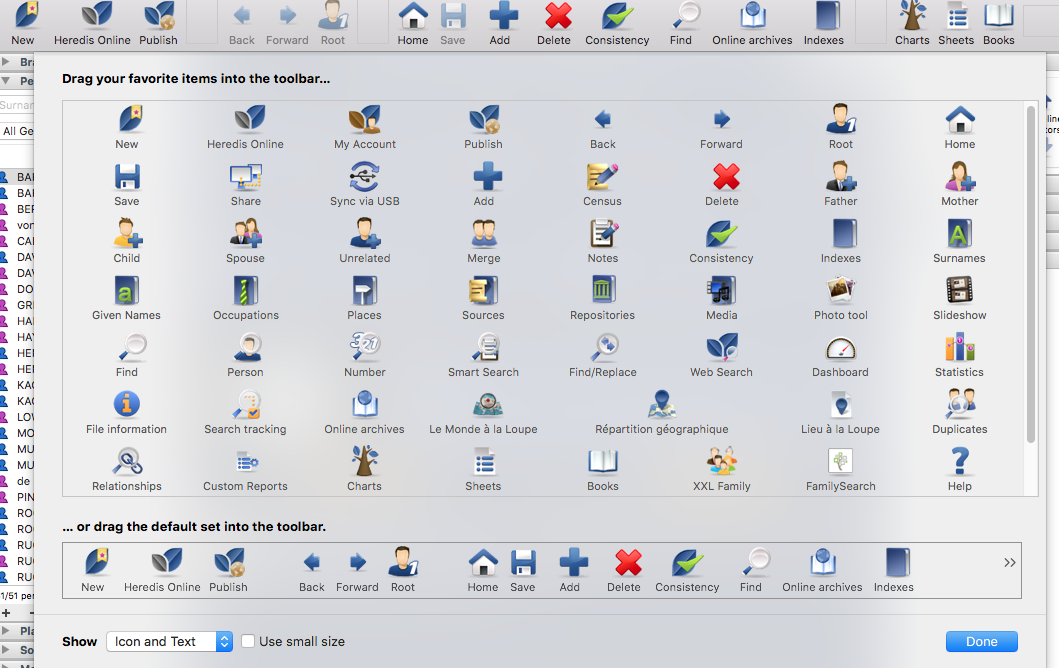
Click Customize button ![]() to select the tools you need. You can also choose the size of icons and to display or not the text.
to select the tools you need. You can also choose the size of icons and to display or not the text.
- To add a button in the toolbar,
- (Mac) Choose an icon, drag and drop it to your toolbar at the desired location.
- (Windows) Choose an icon and either drag and drop it from left to right or click on Show to add it on your toolbar.
- To remove an icon,
- (Mac) Drag it out of the toolbar. Click on Done to close the window.
- (Windows) Either drag it from right to left or click on Hide.
- To order the icons
- (Mac) Drop the icons and place them in the order you want.
- (Windows) Click on the Up and Down buttons or drag and drop on the list. Click on Close button to close the window.
- You can also add extra spaces between the buttons.
- To display the buttons as they were when Heredis was first launched,
- click on Default Set button.
- drag the default set to the toolbar.
(Mac) Customize the toolbar
(Windows) Customize the toolbar

You need more space? Then change the display format of the icons.
(Windows) Tick or Untick Big Icons and Icons and Text.
(Mac) Select Icon only from the Show pop-up menu and click Use small size.
Customize the panels
Display or hide the panels
Certain panels are of no use to you? Click the closure button and they will disappear from the column.
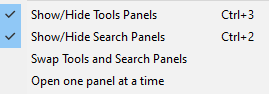
(Windows) You can hide or display the Search and Tools panels on one side or the other of the screen. Click the arrow at the top of the panels ![]()
![]() to open or close them or choose Windows menu > Show/Hide Tools Panels, or Show/Hide Search panels, or One panel at a time. You can also swap the panels. You may alter column width and height of panels if necessary.
to open or close them or choose Windows menu > Show/Hide Tools Panels, or Show/Hide Search panels, or One panel at a time. You can also swap the panels. You may alter column width and height of panels if necessary.
(Windows) Available Panels


(Mac) Use the buttons ![]()
![]() at the bottom of the screen to change the display of panels. The arrow button to the right
at the bottom of the screen to change the display of panels. The arrow button to the right ![]() or left
or left ![]() will display the column, you can click on the cross button to hide the panel. The cogwheel
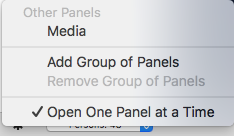
will display the column, you can click on the cross button to hide the panel. The cogwheel ![]() button at bottom right will give you access to any panels which have been removed. A simple click will display the panel again.
button at bottom right will give you access to any panels which have been removed. A simple click will display the panel again.
The procedure for opening the panels may be different for each column. Select Open one panel at a time and the panel which is open will automatically close when another panel is opened in the same column. Otherwise the panels will remain open as long as you have not clicked the disclosure triangle.
Add a column of panels if you want to have more information simultaneously displayed.
You may reposition a panel in the column or to another column by drag and drop with the mouse. Its new position is indicated by a blue line and then release the mouse to place it there.
(Mac) Available Panels


(Mac) Display a hidden panel from cogwheel
Resize the panels
Panels are resizable in width. Click on the line between panel/navigation screen.
The cursor shape will change and turn into ![]() . You may increase or decrease the proportion of the screen allocated to the panels. The display area of the panel is vertically adjustable in the same way. If your cursor shape becomes
. You may increase or decrease the proportion of the screen allocated to the panels. The display area of the panel is vertically adjustable in the same way. If your cursor shape becomes ![]() or
or ![]() , you can change the size of the column or area.
, you can change the size of the column or area.
Arrange the panels
(Windows) Panels may be positioned to the right or left of the navigation screen. You can change their position by using the Windows menu > Swap Tools and Search panels. Select Open one panel at a time in the Windows menu to save space on your screen. Heredis automatically closes the open panel when you click the arrow to display the other panel.
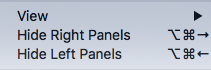
(Mac) Move the panels by using drag and drop. Click the top bar of the panel and drag to the desired location for the panel in any panel column. When the desired destination is highlighted by a blue line, release the mouse. Choose Open One Panel at a Time by using the Options ![]() panel button. Heredis automatically closes the displayed panel when you click the display triangle of another panel. Use Window menu to Show or Hide right or Left Panels.
panel button. Heredis automatically closes the displayed panel when you click the display triangle of another panel. Use Window menu to Show or Hide right or Left Panels.
Select data entry method
Heredis allows you to display only the information that you commonly use. This visual selection mode in no way changes your data, which are still preserved whether or not you display them. You can change the data entry mode at any time.
Depending on whether or not you have a complete deed or just a mention on a website, you will not need the same input fields. This is why the Heredis data entry fields are modular.
There are three data entry modes (Basic – Comprehensive – Customized) that you may use in different ways depending on the data input screen (Add screen, Personal Data tab, Family Group Data tab).
The Basic mode is displayed by default. This mode displays only the main fields. You can change the data input mode at any time.
Choose between Basic, Comprehensive or Customized mode by clicking on the cogwheel ![]() on top right of Add screen, Personal Data tab or Family Group Data tab.
on top right of Add screen, Personal Data tab or Family Group Data tab.
Prepare the data entry screen to your liking by using the Customized view.
Each data entry screen will then display the selected items. Every inputting screen can display a different mode. You can for example choose Basic mode for Add screens and Customized mode for Personal Data tab.

Check the items not displayed
If you choose the Basic or Customized display modes, it may happen that certain information entered does not appear. Heredis alerts you by displaying an alert triangle ![]() next to the cogwheel icon
next to the cogwheel icon ![]() (Choose data fields you wish to use).
(Choose data fields you wish to use).
Click the alert triangle ![]() : the display is changed temporarily and all saved data items are displayed.
: the display is changed temporarily and all saved data items are displayed.
When you navigate to another person, the data items are again hidden in accordance with the mode you have chosen.
See also Heredis’ Preferences and Change Heredis colored Theme.